
In summary:
- Watching videos leads to poor skill retention; hands-on practice builds lasting “Mechanic’s Intuition.”
- Mastery comes from sensory calibration: learning the feel, sound, and look of a correct repair.
- Focus on critical failure points like torque specs and known weak components (e.g., derailleur hangers).
- A simple triage system (Red, Yellow, Green) dictates whether a field fix is safe to get you home.
- Condition your skills proactively, just like you condition your body, to ensure reliability under pressure.
You’ve been there. Stranded on a trail, miles from anywhere, with a simple mechanical problem you just watched a dozen YouTube videos about. Yet, with tools in hand, the knowledge vanishes. The bike shop’s bill that follows is a painful reminder that watching isn’t the same as doing. This cycle of paying for minor repairs is frustrating, expensive, and chips away at the very freedom your gear is supposed to provide. Many will tell you to “practice more” or “buy better tools,” but this advice misses the fundamental reason why skills don’t stick.
The truth is, true mechanical competence isn’t about memorizing a sequence of steps. It’s about developing a deeper, more intuitive understanding of your equipment. It’s a skill forged not on a screen, but in your hands, ears, and eyes. The secret to retaining 90% of what you learn isn’t more information, but a different quality of practice—one focused on building sensory memory.
This guide departs from conventional wisdom. We will explore why passive learning fails and introduce the concept of “Mechanic’s Intuition.” You will learn to calibrate your senses to recognize correct feedback, identify the critical tools and failure points that truly matter in the field, and understand the crucial difference between a factory-perfect repair and a safe-enough field fix. By the end, you’ll have a framework for turning abstract knowledge into reliable, hands-on skill, giving you the autonomy you’ve been seeking.
For those who prefer a visual demonstration, the following video offers a practical look at one of the most common trailside adjustments: tuning a rear derailleur. It’s a perfect starting point to observe the mechanics before applying the hands-on principles discussed in this guide.
To help you navigate this path to mechanical mastery, we’ve structured this guide to build your skills progressively. Each section tackles a core component of developing true self-sufficiency, from understanding the learning process to mastering specific, high-stakes repairs and even conditioning your body for the demands of your sport.
Summary: A Guide to Building Real-World Mechanical Skill
- Why watching YouTube videos fails compared to hands-on practice for 70% of learners?
- What are the 5 tools you must carry to fix a mechanical failure on the trail?
- Factory Standard or Field Fix: When is “good enough” safe to get you home?
- The torque mistake that cracks frames and costs $2,000 in damages
- When to service your suspension forks to avoid a full rebuild bill?
- The tiny part oversight that ends your trip if your bike falls over
- How to inspect your lines like a pro to prevent mid-air snaps?
- How to Condition Your Knees for Downhill Hiking in 4 Weeks?
Why Watching YouTube Videos Fails Compared to Hands-on Practice for 70% of Learners?
The core reason video tutorials fail to create lasting skill is the vast gap between passive observation and active engagement. Your brain is wired to learn and retain information differently based on how it’s received. According to comprehensive research from 2024, active learning through hands-on practice achieves up to 90% knowledge retention, while passive methods like watching a video languish at a mere 10%. You’re not just learning a procedure; you’re building a physical and mental connection to the task.
True mechanical skill is a sensory conversation. When you perform a repair, you’re engaging in a haptic feedback loop—a dialogue between your hands and the components. A video cannot teach you these crucial sensory cues. Mastery isn’t knowing you need to tighten a bolt; it’s feeling the precise moment the threads engage properly, sensing the increase in resistance that signals correct tension, and hearing the subtle click of a perfectly seated part. These are the data points that build real competence.
This hands-on, sensory-driven learning is what separates a novice from a seasoned mechanic. You are training your body to recognize patterns that a camera can’t capture and a narrator can’t describe. The key sensory skills that video tutorials simply cannot teach include:
- Haptic Feedback: Feeling the satisfying ‘click’ of a properly seated component.
- Tension Recognition: Detecting the correct bolt tension through developing resistance patterns, long before a torque wrench is involved.
- Aural Diagnostics: Recognizing abnormal sounds—a slight grind, a squeak, a scraping noise—that indicate problems during assembly.
- Muscle Memory: Building the ingrained physical memory for applying precise force, especially for low-torque applications.
- Intuitive Limits: Developing an instinct for material stress limits through tactile experience, knowing how far a part can be pushed before it deforms or fails.
Without this sensory calibration, you are merely a spectator. The moment you are faced with a real-world problem, without the familiar video cues, the knowledge proves shallow and unusable. The goal is to move from watching to doing, transforming abstract steps into ingrained, intuitive actions.
What Are the 5 Tools You Must Carry to Fix a Mechanical Failure on the Trail?
Autonomy in the field isn’t about carrying an entire workshop on your back; it’s about carrying the right tools to solve the most common and trip-ending failures. An effective trail kit is a lesson in ruthless efficiency. Every item must serve a primary function and, ideally, offer secondary uses for unforeseen problems. Forget the bulky, 20-piece sets. A master mechanic’s trail kit is lean, light, and potent, focusing on the five items that solve over 90% of ride-stopping issues.
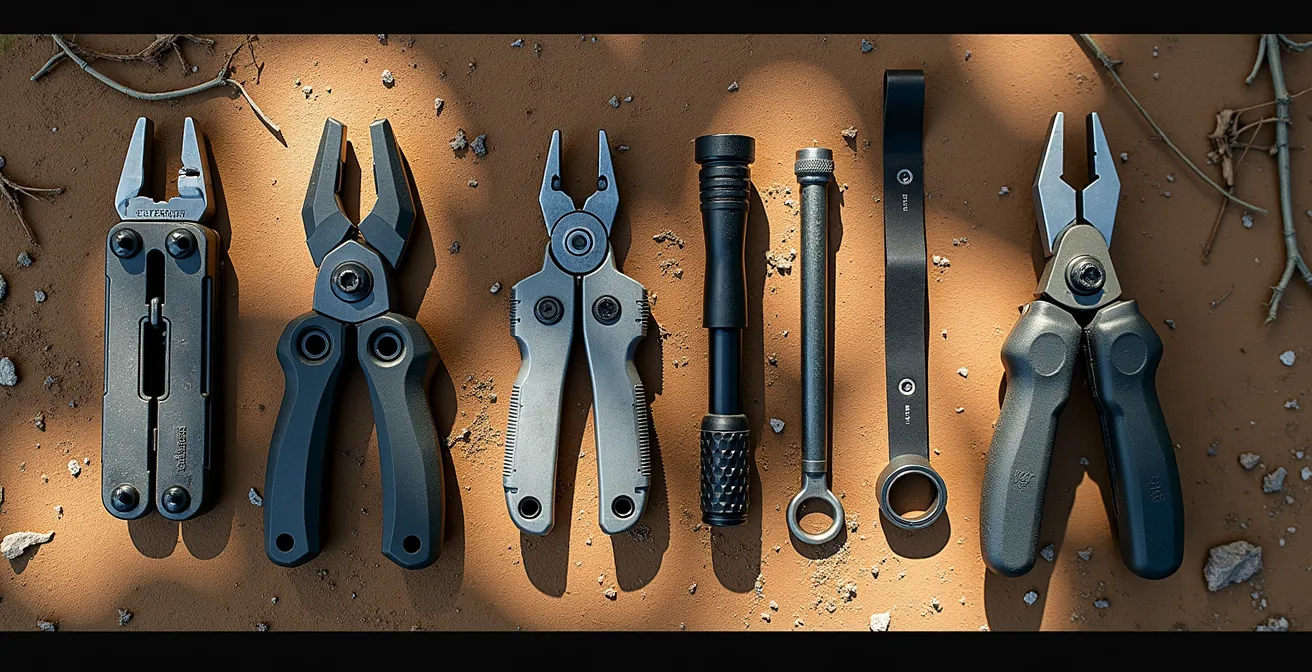
These tools are your lifeline. They are designed to address failures in the four most vulnerable systems on a bike: the drivetrain, tires, controls, and structural components. Investing in quality versions of these five items is far more valuable than owning a comprehensive but heavy kit you’re tempted to leave at home. The table below breaks down their problem-solving capabilities, showing how a minimal investment in gear yields maximum reliability.
| Tool | Primary Function | Secondary Uses | Failure Prevention Rate |
|---|---|---|---|
| Multi-tool with chain breaker | Drivetrain repairs | Adjusting derailleurs, tightening bolts | Solves 90% of drivetrain issues |
| Tire plugs & CO2 inflator | Tubeless puncture repair | Emergency sealant distribution | Fixes 95% of tire failures |
| Zip ties (10 pack) | Emergency securing | Spoke holder, cable guide, part stabilizer | Multiplier tool for various fixes |
| Duct tape (wrapped on pump) | Structural reinforcement | Tire boot, cable protection, frame guard | Universal backup solution |
| Torque key (5Nm preset) | Critical bolt verification | Prevents over/under tightening | Prevents 80% of bolt failures |
Notice the inclusion of the preset torque key. This isn’t just a workshop tool; it’s a critical field instrument for verifying the security of vital components like your stem and controls after a crash or adjustment. It’s the bridge between a “good enough” field fix and a genuinely safe one.
Factory Standard or Field Fix: When Is “Good Enough” Safe to Get You Home?
A critical part of developing “Mechanic’s Intuition” is knowing the difference between a perfect repair and a safe-enough field fix. In the workshop, the goal is the factory standard: precise torque, perfect alignment, and new parts. In the field, the goal is survival: getting yourself and your equipment home safely. The question “is it good enough?” is a dynamic risk assessment. This is where your judgment surpasses any tool’s capability.
A field fix often involves creativity and compromise. Using zip ties to secure a rattling part or wrapping duct tape around a cracked component are valid strategies, but they must be applied with a clear understanding of the forces involved. A temporary fix on a non-structural part like a bottle cage is low-risk. A compromised fix on a high-stress component like a handlebar or brake lever is a gamble you should never take. The key is to develop a failure triage mindset, categorizing problems based on their immediate threat to your safety.
This judgment is essential because tools can be misleading. A torque wrench can tell you a bolt is tight, but it can’t tell you if the threads are stripped. As the experts at Park Tool wisely point out, the mechanic’s awareness is paramount. This is a perfect example of where sensory feedback trumps a simple reading on a dial. The Park Tool Technical Team states in their Torque Specifications Guide:
A cross-threaded bolt will not properly tighten even with a torque wrench. The mechanic must be aware of the purpose of torque, and what torque and fastener preload are doing to the component joint.
– Park Tool Technical Team, Park Tool Torque Specifications Guide
To make safe decisions under pressure, you must learn to categorize repairs into distinct levels of risk. A simple “Red, Yellow, Green” system is a powerful mental model for this. Red fixes are non-negotiable “walk out” scenarios. Yellow fixes allow you to proceed with extreme caution on controlled terrain. Green fixes are minor annoyances that don’t compromise safety. Understanding this framework is more important than knowing how to execute any single repair.
The Torque Mistake That Cracks Frames and Costs $2,000 in Damages
No single mechanical skill is more critical, or more misunderstood, than applying correct torque. This is especially true with modern equipment, where lightweight carbon fiber has replaced forgiving steel and aluminum. The margin for error is razor-thin. Over-tightening a bolt by just a few newton-meters can crush a carbon seatpost or crack a $2,000 frame. Under-tightening can lead to components slipping or failing catastrophically during a ride. This is the epicenter of the “Mechanic’s Intuition.”
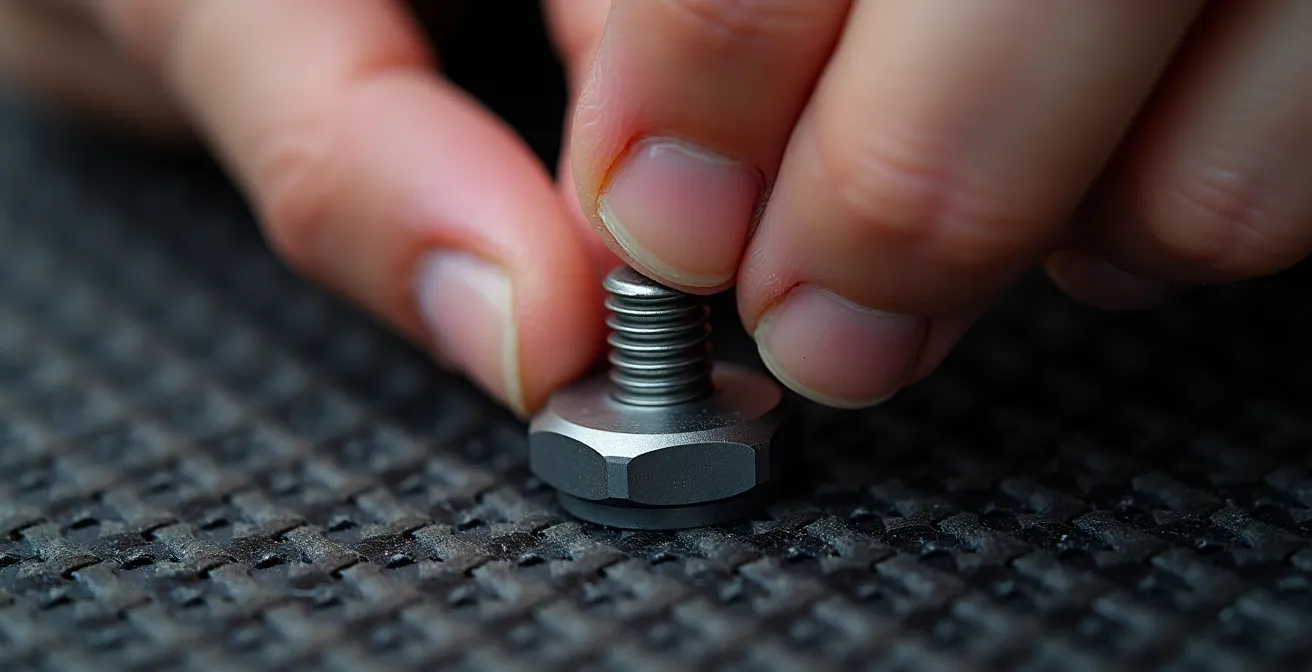
The vast majority of critical bolts on a modern bike have remarkably low torque specs. In fact, cycling industry standards specify a range of 4-6 Nm for 90% of carbon component bolts. That’s a force most people can apply with just two fingers on a small Allen key. The problem is, without a calibrated sense of touch, it’s nearly impossible to judge this force accurately. This is where deliberate sensory calibration comes in. Using a torque wrench isn’t just for final tightening; it’s a training device to teach your hands what 5 Nm feels like.
Practice this: use a torque wrench to tighten a bolt to 5 Nm. Loosen it, and then try to replicate that feeling by hand. Check your work with the wrench. Repeat this process until your muscle memory is so ingrained that your hand *is* the torque wrench for initial tightening. This haptic skill is your primary defense against costly damage. Pay special attention to the most common and costly torque mistakes:
- Seat Post Clamps: On carbon frames, these have a maximum rating of around 5 Nm. Over-tightening crushes the frame tube, often requiring a full frame replacement (damage: $500-$2,000+).
- Stem Bolts: These must be tightened evenly in a cross pattern to 5-6 Nm. Uneven or excessive torque can lead to handlebar failure under load.
- Crank Preload Caps: These delicate plastic caps only require 0.7-1.5 Nm—just enough to remove play. Over-tightening destroys the expensive bottom bracket bearings.
A systematic, 60-second pre-ride check of these critical bolts, using your calibrated hands to feel for any looseness, can prevent the vast majority of torque-related failures. It’s the cheapest insurance you can have.
When to Service Your Suspension Forks to Avoid a Full Rebuild Bill?
If torque is about immediate, catastrophic failure, suspension service is about preventing slow, expensive decay. Your bike’s suspension fork is a complex hydraulic system operating under incredible stress. Its smooth performance depends on clean oil and intact seals. Ignoring its service schedule is a direct path to a massive repair bill. A simple “lower leg service” is an easy, inexpensive DIY job. A full rebuild caused by neglect is not.
The difference in cost and complexity is staggering. A basic service involves replacing the bath oil in the lower legs to keep things lubricated. This is preventative. When this is neglected, dirt works its way past the seals and contaminates the oil. This gritty fluid then acts like liquid sandpaper, destroying the delicate internal bushings and permanently scratching the fork’s stanchions (the smooth upper tubes). At this point, you’re no longer performing maintenance; you’re attempting a salvage operation.
The “Mechanic’s Intuition” here is proactive awareness. You must learn to recognize the early warning signs of a fork needing service: a slight weeping of oil around the seals, a “stickier” feel in the initial travel, or an audible sucking sound. Waiting until the fork feels harsh or loses travel is too late. The damage is already done. Adhering to the manufacturer’s recommended service interval (typically every 50 hours of riding) is non-negotiable for preserving performance and value.
The financial incentive for staying on schedule is undeniable. The table below illustrates how a small delay quickly cascades into a major expense, with a significant loss in ride quality and safety along the way.
| Service Delay | Service Type Required | Cost | Ride Quality Impact |
|---|---|---|---|
| 0 months (on schedule) | Lower leg service only | $30 DIY / $75 shop | Optimal performance |
| 6 months overdue | Seals & bushing replacement | $150 | 20% performance loss |
| 12 months overdue | Full rebuild + stanchion work | $400+ | 50% performance loss, safety risk |
Think of suspension service like changing the oil in your car’s engine. It’s not optional. It’s the fundamental act of maintenance that ensures the entire system’s longevity. Neglecting it is choosing to replace the engine later.
The Tiny Part Oversight That Ends Your Trip if Your Bike Falls Over
Sometimes, the most catastrophic failure comes from the smallest, most overlooked component. On any modern bike with a derailleur, there is one part specifically designed to fail: the derailleur hanger. This small, inexpensive piece of aluminum is the sacrificial lamb of your drivetrain. It connects the expensive rear derailleur to the even more expensive frame, and its sole purpose is to bend or break upon impact, protecting the other two components from damage.
A simple fall on the drivetrain side, or even just laying the bike down incorrectly, can be enough to bend the hanger. A bent hanger causes poor shifting, chain noise, and in a worst-case scenario, can throw the derailleur into the spokes of your rear wheel, resulting in a yard sale of shrapnel that was once your drivetrain. A broken hanger instantly renders your bike a single-speed at best, or completely unrideable at worst.
This is a classic test of a mechanic’s foresight. A replacement derailleur hanger costs about $15-$25 and weighs next to nothing. Not having one can prematurely end a multi-day bikepacking trip or leave you with a very long walk home. The problem is that nearly every bike frame model uses a unique hanger design. You cannot borrow one from a friend unless they have the exact same frame model and year. It is a part you must source and carry for your specific bike.
Knowing this is a prime example of “Mechanic’s Intuition.” It’s about understanding the system’s engineered weak points and preparing for their inevitable failure. Before any significant trip, you should not only have a spare hanger in your pack, but you should also practice removing the old one and installing the new one at home. The two small bolts that hold it in place can be tricky to access, and the trailside is no place to be learning this for the first time. This single piece of preparation is one of the highest-value actions you can take to guarantee your ride continues as planned.
How to Inspect Your Lines Like a Pro to Prevent Mid-air Snaps?
The principle of “Mechanic’s Intuition” extends far beyond cycling. In any activity where your life depends on your gear—like climbing or paragliding—the ability to assess the health of your equipment through sensory feedback is a life-saving skill. Nowhere is this more apparent than in line inspection. A visual check is only the first step; a professional inspection is a tactile process.

To inspect a climbing rope or paraglider lines like a pro, you must use your hands to feel what your eyes might miss. Run the line slowly through your fingers, applying gentle pressure. You are searching for any deviation from the norm. Your highly sensitive fingertips can detect subtle changes in diameter, stiffness, or texture that signal internal damage. Key things to feel for are:
- Flat Spots or Lumpiness: Indicates potential core damage in a climbing rope, where the internal fibers have been compromised.
- Glazing or Stiffness: A sign of heat damage from excessive friction, which can weaken the material.
- Fraying or Abrasion: Obvious visual cues that are confirmed by a rough texture, indicating significant wear.
- Inconsistent Diameter: A bulge or thinning of a line suggests the sheath and core may have shifted or been damaged.
This hands-on method is proven to be dramatically more effective for skill retention and application. Studies show that the learning retention rates of eLearning is 25-60% when hands-on practice is incorporated, reinforcing that physical interaction is essential for critical safety checks. Your hands become your most important diagnostic tool. This tactile inspection should be a non-negotiable part of your pre-flight or pre-climb routine, turning a mundane check into a deliberate, mindful safety procedure.
Key takeaways
- True mastery is sensory: Prioritize hands-on practice to develop a “feel” for your equipment that videos can’t teach.
- Focus on high-consequence systems: Master torque application and preventative suspension service to avoid the most expensive failures.
- Embrace failure triage: Learn to assess risk in the field to know when a “good enough” fix is safe and when it’s time to walk out.
How to Condition Your Knees for Downhill Hiking in 4 Weeks?
The final, and perhaps most important, aspect of mechanical self-sufficiency is understanding that your body is the most critical piece of equipment you own. Just as you must proactively service your gear to prevent failure, you must condition your body to withstand the stresses of your sport. Downhill hiking is notoriously brutal on the knees, but just like a mechanical skill, resilience can be trained. The forgetting curve is a powerful analogy here; cognitive science research demonstrates that up to 50% of information is forgotten within one hour without reinforcement. Similarly, your body’s strength and stability will degrade without consistent, targeted conditioning.
The key to building bombproof knees is eccentric muscle training. This involves loading the muscle while it is lengthening—exactly what your quadriceps do to control your descent during a downhill hike. By systematically training this specific movement, you build strength and control, reducing the impact forces that travel through your knee joint. A focused, 4-week protocol can dramatically improve your knee health and confidence on descents. This isn’t just about getting stronger; it’s about conditioning your neuromuscular system to absorb shock effectively.
This physical preparation is a direct metaphor for mechanical training. Each repetition of an exercise builds muscle memory and resilience, just as each repetition of a repair builds sensory calibration and skill. Both require a proactive, disciplined approach rather than a reactive one after a failure has already occurred.
Your Action Plan: 4-Week Eccentric Loading Protocol for Knee Conditioning
- Week 1: Bodyweight Foundation. Focus on slow-negative bodyweight squats. Take a full 3 seconds to lower yourself and 1 second to stand up. Perform 3 sets of 10 repetitions daily to build the initial neuromuscular connection.
- Week 2: Introduce Load. Add a weighted pack (10% of your body weight) and perform box step-downs. Stand on a sturdy box or stair, and slowly lower one leg to the ground. Perform 3 sets of 8 repetitions for each leg.
- Week 3: Increase Load and Instability. Increase the pack weight to 15% of your body weight. Continue with step-downs and add single-leg balance drills on an unstable surface like a pillow or cushion to improve proprioception.
- Week 4: Real-World Application. Perform full, weighted descents on a steep hill or flight of stairs, carrying a pack with 20% of your body weight. Go for 20 continuous minutes, focusing on smooth, controlled movements.
- Daily Calibration: Every day, perform proprioceptive calibration by standing on one leg with your eyes closed for 3 sets of 30 seconds. This fine-tunes your body’s internal balance system.
This conditioning plan is your insurance against trip-ending pain and injury. It transforms your knees from a liability into a reliable asset, allowing you to focus on the journey, not the ache.
Now, stop watching and start doing. Pick one small task—checking your torque, inspecting a line, or doing your first set of slow-negative squats. Calibrate your senses, listen to the feedback from your gear and your body, and take the first real step toward true, lasting autonomy.
Frequently Asked Questions on Field Repairs
What repairs are RED (unsafe to ride)?
Any repair affecting structural integrity is considered RED. This includes a cracked frame, a loose stem, compromised brake hydraulics, or a damaged fork. These issues require immediate, professional repair before the equipment can be safely used again. Continuing to ride with a RED-level failure puts you at extreme risk of a catastrophic accident.
What repairs are YELLOW (ride with extreme caution)?
YELLOW repairs are compromised but functional fixes that allow you to proceed, but only with extreme caution. Examples include a drivetrain converted to a single speed due to a broken derailleur, a slightly bent derailleur hanger causing minor ghost-shifting, or a temporary cable housing repair with tape. When riding with a YELLOW fix, you should move slowly, avoid aggressive terrain, and head directly for the trailhead.
What repairs are GREEN (minor inconvenience)?
GREEN repairs are non-critical issues that do not affect the safety or core function of your equipment. This could be a zip-tied GPS mount, a missing bottle cage bolt, or purely cosmetic damage like a scratch or scuff. While these issues should be properly fixed later in the workshop, they pose no immediate danger and do not require you to alter your plans.