
Carrying the right gear is just the entry fee; real backcountry safety comes from a disciplined mindset, not the hardware in your pack.
- Blindly following existing tracks is a critical error, as stable-looking terrain can become a trap within hours due to changing conditions.
- True risk assessment is a conscious calculation of “Consequence x Probability,” not just a gut feeling or reaction to the avalanche forecast.
Recommendation: Your primary safety tool is systematic observation. Develop the habit of constantly questioning every assumption about the snowpack and terrain before you drop in.
So, you’ve mastered every black diamond at the resort. You can carve trenches on groomers and float through in-bounds powder with your eyes closed. The siren song of untouched lines just beyond the ropes is getting louder. That’s the pull. But stepping into the backcountry is like moving from a controlled swimming pool to the open ocean. Your strength as a rider is assumed, but your survival depends on an entirely new skillset: a backcountry mindset. Many articles start and end with the holy trinity: beacon, shovel, and probe. And yes, you absolutely must have them and know how to use them. But that’s just the gear checklist. It won’t keep you out of an avalanche.
This guide isn’t about what to pack. It’s about how to think. We’re going to bypass the usual platitudes and dive into the mental frameworks that seasoned guides use to make decisions. The real key to safely riding incredible lines isn’t just avoiding danger, but actively understanding and managing risk. It’s about shifting your focus from the thrill of the descent to the discipline of observation. We’ll explore why trusting others’ tracks can be a fatal mistake, how to transform a gut feeling about risk into a calculated decision, and how to manage the single biggest variable in the mountains: yourself. This is about building the habits that let you ride untracked snow for decades to come, not just for one epic afternoon.
For those who prefer a visual summary, the following video from the Utah Avalanche Center provides a foundational overview of the “Know Before You Go” principles, which perfectly complement the in-depth strategies we’ll discuss.
This article is structured to build your backcountry decision-making framework from the ground up. We will cover critical observation skills, rescue fundamentals, risk calculation, and the all-important human factors that influence your choices in high-stakes environments.
Summary: A Guide’s Framework for Reading and Riding Untracked Terrain
- Why following someone else’s tracks can lead you off a cliff or into a terrain trap?
- How to perform a companion rescue drill in under 7 minutes?
- Splitboard or Snowshoes: Which is more efficient for short backcountry laps?
- The speed mistake that leaves snowboarders stuck in flat powder sections
- What are the 3 “Red Flags” in the snowpack that mean you should go home?
- How to calculate “Consequence x Probability” before dropping into a line?
- How to predict an afternoon thunderstorm using only cloud formation cues?
- How to Manage the “Adrenaline Dump” After Extreme Sports?
Why following someone else’s tracks can lead you off a cliff or into a terrain trap?
Seeing a perfect set of S-turns snaking down a pristine powder face feels like an invitation. It’s tempting to assume, “If someone else rode it, it must be safe.” This is one of the most dangerous assumptions a newcomer can make. A set of tracks tells you only one thing for certain: someone was there at some point in the past. It tells you nothing about the conditions *right now*. The snowpack is a dynamic entity; sun, wind, and temperature can transform a stable slope into a time bomb in a matter of hours. The person who left those tracks might have been lighter, more experienced, or simply luckier than you.
More critically, tracks don’t reveal what’s underneath. They can lead you directly into a terrain trap—a gully, creek bed, or depression where avalanche debris can pile up deep, making survival nearly impossible. Or worse, they can guide you over a convex roll that hides a cliff band below. With an average of 27 people who die in avalanches annually in the United States alone, blindly trusting old tracks is a gamble you can’t afford. Your safety depends on your own observations, not on the ghost of a rider who came before you. Every line choice must be a fresh decision based on what you see and know in the present moment.
Your Action Plan: Track Analysis Safety Checklist
- Evaluate the age of the tracks: Fresh snow even lightly covering them means conditions have already changed.
- Analyze turn quality: Sharp, clean turns can suggest stable snow, while chattery, skidded marks may indicate ice or difficult conditions hiding under the powder.
- Check track depth: If your own track is sinking much deeper, it could indicate significant new snow loading since the original tracks were made.
- Look for wind loading signs: Are new snow drifts or cornices forming and partially covering the tracks? This invalidates any information they provided.
- Adopt a zero-trust policy: Never assume tracked terrain is safe. Always perform your own full assessment of the slope.
Treating every untracked slope—even one with old tracks—as a blank slate for your own analysis is the first step in developing a true backcountry mindset. It’s about taking full ownership of your safety.
How to perform a companion rescue drill in under 7 minutes?
When an avalanche happens, the clock is your biggest enemy. There is no calling for help; you and your partners are the first responders. The stark reality is that the chance of survival drops dramatically after 15 minutes of burial. This is why the goal isn’t just to know how to use your gear, but to be brutally efficient. A 7-minute drill isn’t about showing off; it’s about building the muscle memory needed to perform under the most extreme stress imaginable.
A successful rescue is a sequence of disciplined actions. It starts the moment the avalanche stops. The first step is a signal search, using your beacon to scan for the victim’s transmission while you visually scan the debris field. Once you acquire a signal, you transition to the coarse search, moving quickly in the direction indicated by your beacon. At around 10 meters, you slow down for the fine search, getting your beacon close to the snow surface in a grid pattern to pinpoint the strongest signal. The final step is probing and shoveling. You probe in a spiral pattern outward from your strongest signal. Once you get a positive strike, leave the probe in place and begin shoveling like your friend’s life depends on it—because it does. Training protocols emphasize strategic, V-shaped shoveling to move snow efficiently away from the victim, rather than just digging straight down.
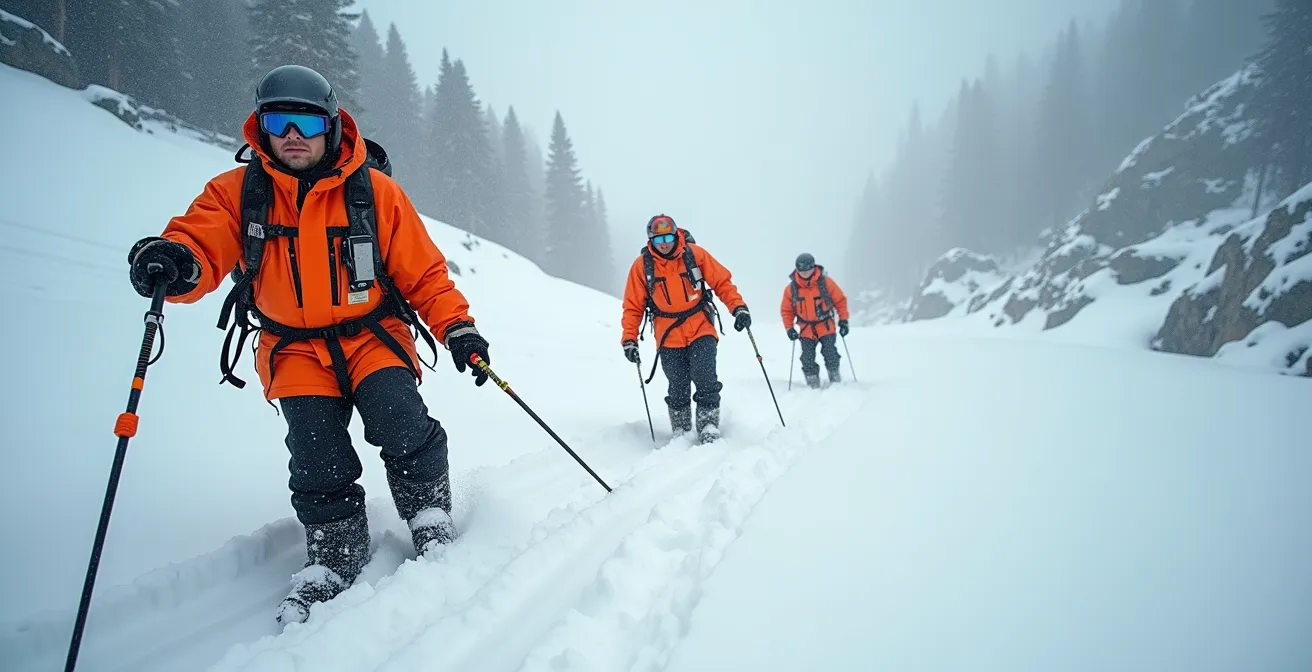
As this image shows, practice should happen in realistic terrain, not a flat field. The stress of managing gear on a slippery, uneven slope is part of what you need to master. Notice the focus and systematic approach of the rescuers; this is the result of relentless practice. There is no room for panic, only for process. Your goal is to make these actions so automatic that they can be executed flawlessly when your mind is reeling from shock and adrenaline.
Find a safe, low-angle slope with your partners and practice this drill until it’s boring. Bury a pack with a beacon inside and time each other. The day you need this skill, you’ll be thankful for every second you shaved off in practice.
Splitboard or Snowshoes: Which is more efficient for short backcountry laps?
Once you decide to earn your turns, the first big gear question is how to get up the hill. For snowboarders, it comes down to two primary options: a splitboard or snowshoes with your solid board on your back. For long, straightforward ascents with a single descent, a splitboard is the undisputed king of efficiency. But for “short laps”—repeating a fun zone with varied terrain—the answer gets more nuanced. It’s a trade-off between uphill gliding efficiency and transition time.
A splitboard’s primary advantage is its gliding motion. On flat or gently rolling terrain, you can slide your skis forward, saving a huge amount of energy compared to the high-knee “step-lift-place” motion of snowshoeing. However, this advantage comes at the cost of transition time. Switching from ride mode to tour mode and back again involves unstrapping, splitting the board, attaching bindings, and packing skins. A smooth transition takes 3-5 minutes. Snowshoes, on the other hand, can be kicked off and strapped to your pack in under 30 seconds. On steep, direct ascents (over 25 degrees), snowshoes with aggressive crampons often provide better, more direct purchase than climbing skins, which may require you to set an inefficient zig-zagging skin track.
This comparative analysis from a leader in snow travel equipment helps break down the key factors in this decision.
| Factor | Splitboard | Snowshoes |
|---|---|---|
| Energy Efficiency | High – gliding motion saves energy on flats | Lower – requires lifting with each step |
| Steep Terrain (20-30°) | Requires switchbacks, skins lose grip | Can ascend directly with crampons |
| Transition Time | 3-5 minutes to switch modes | 30 seconds to attach to pack |
| Rolling Terrain | Excellent – maintains momentum | Challenging – constant up/down effort |
| Initial Cost | $1000+ for full setup | $100-150 for quality pair |
This perspective is echoed by experienced users in the community. As one member of the Rokslide Forum, a community for backcountry enthusiasts, aptly puts it:
Splitboards are great for doing long climbs to the top of a mountain where your goal is to rip back down it. For covering various terrain it simply is the wrong setup.
– Rokslide Forum backcountry community
For quick hits on a specific slope or exploring complex, up-and-down terrain, the quick transitions and direct-ascent capability of snowshoes can make them more “efficient” overall, despite the lower energy efficiency per step. For a long tour to a distant peak, the splitboard is the clear winner.
The speed mistake that leaves snowboarders stuck in flat powder sections
There are few things more frustrating in the backcountry than nailing a perfect powder line only to bog down and get stuck in a flat runout. Getting stuck is a total buzzkill, but it’s also a serious energy drain that can impact your decision-making for the rest of the day. For snowboarders, unlike skiers who can use their poles to skate, getting stuck often means unstrapping and post-holing. The most common mistake isn’t a lack of skill, but a failure of line planning and speed management.
Before you even drop in, you need to read the entire line from top to bottom, specifically identifying any flat benches, meadows, or gullies that could rob you of your momentum. The mistake is treating the line as a series of disconnected turns rather than a single, fluid path. Riders often scrub too much speed high on the slope while enjoying the deep powder, only to realize too late that they don’t have enough velocity to carry them across the upcoming flat section. You have to think several turns ahead, consciously building speed *before* you hit the flats.
Maintaining momentum requires a subtle but active approach. Here’s how to avoid the dreaded post-hole of shame:
- Identify Flat Zones First: Before you drop, use terrain features to spot potential momentum killers like benches, wide tree-less areas, and creek beds.
- Plan for the Fall Line: Your line should maximize time spent pointing straight down the slope and minimize long, speed-killing traverses.
- Build Speed Intentionally: As you approach a flat section, link your turns to generate speed rather than using them to check speed. Think of it as accelerating into the flats.
- Stay Centered: Keep your weight centered over the board. Leaning back, a common powder-riding habit, creates immense drag and acts like a brake.
- Pump the Terrain: Use small rollers and terrain variations to pump for speed, just like you would in a skate park, to maintain every bit of momentum.
- Bail Early: If you feel yourself slowing to a crawl, unstrap immediately. Wasting energy trying to wiggle and hop forward is far more exhausting than simply walking a short distance.
Ultimately, avoiding flats is about proactive terrain reading. It’s another layer of the backcountry mindset: you’re not just looking for avalanche danger, you’re also analyzing the terrain for pure rideability.
What are the 3 “Red Flags” in the snowpack that mean you should go home?
The avalanche forecast gives you the big picture before you leave the car, but the snowpack itself provides the most current and localized information. Learning to spot nature’s warning signs, or “red flags,” is a fundamental backcountry skill. While experts track many indicators, there are a few universal red flags that are so significant that even one of them is enough to make you stop, reassess your plan, and likely retreat to safer, low-angle terrain. These are the mountain’s way of screaming “DANGER.”
The three most critical red flags you must be able to identify are:
- Recent Avalanches: If you see evidence of natural avalanches that have occurred within the last 48 hours, it’s a clear sign the snowpack is unstable under the current conditions. It’s the most obvious clue possible that other slopes with similar characteristics are also ready to slide.
- “Whumpfing” or Shooting Cracks: A “whumpf” is a hollow, collapsing sound the snowpack makes under your weight. It’s the sound of a weak layer failing beneath you. Similarly, seeing cracks shoot out from your board or skis is a visual confirmation of the same process. You are literally causing the structure to fracture. This is an immediate, undeniable sign of instability.
- Rapid Warming or Rain on Snow: A sudden spike in temperature or rain falling on an existing snowpack can dramatically weaken the bonds between snow layers. This adds water and weight, which can overload weak layers and lead to widespread, unpredictable avalanche cycles.
These signs are not subtle hints; they are direct evidence that the ingredients for an avalanche are present. Ignoring them is like ignoring the sound of a smoke alarm.
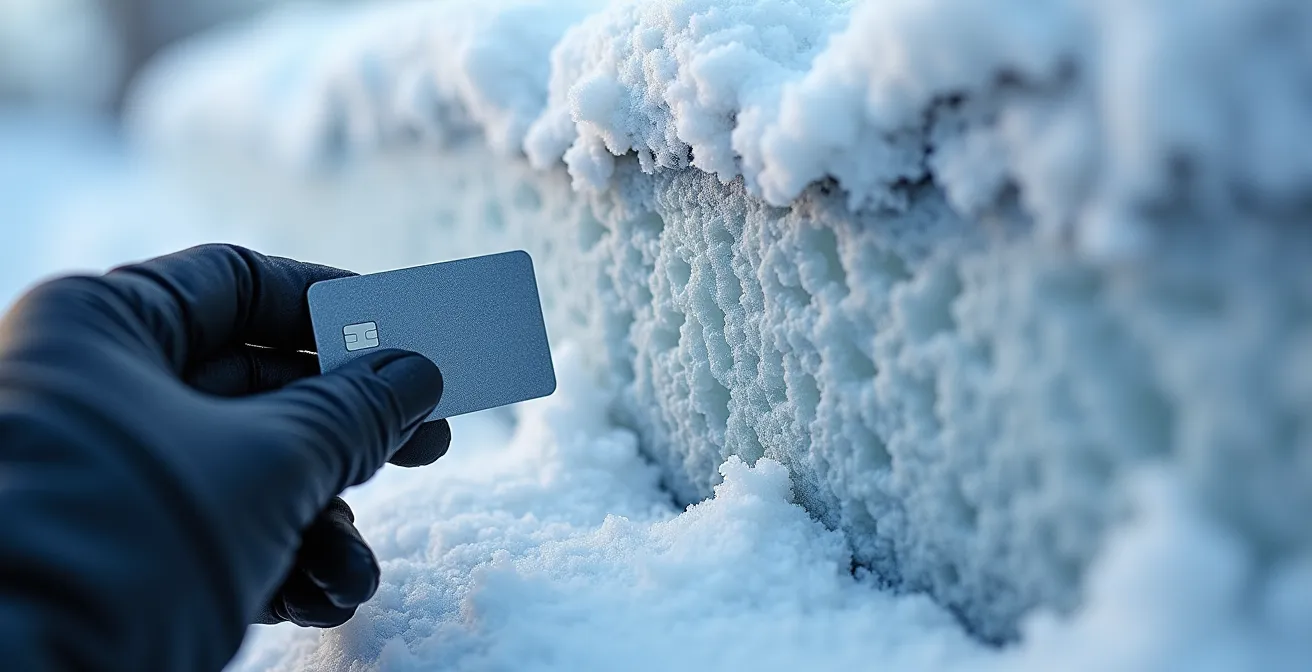
This macro view of a snow pit wall reveals the hidden story. You can see the distinct layers, including the fragile, crystalline structures of hoar frost that act as a weak layer—like a layer of ball bearings waiting for a trigger. Recognizing red flags in the field means you don’t have to dig a pit to know the potential for this kind of structure exists.
When you encounter a red flag, the ego-driven desire to get your line has to take a backseat. The smart, experienced rider knows that the best decision is often to turn around and come back another day. The mountains will always be there.
How to calculate “Consequence x Probability” before dropping into a line?
Making decisions in the backcountry isn’t about being fearless; it’s about being a calculated risk manager. The most effective tool for this is the Risk Assessment Matrix, a mental framework that forces you to separate the *likelihood* of an avalanche from the *severity* of the outcome if one were to occur. You calculate this as Probability x Consequence. A low-probability, high-consequence event can be just as deadly as a high-probability, low-consequence one. This calculation turns a vague “gut feeling” into a more objective, structured decision.
Probability is influenced by the avalanche forecast and the red flags you observe. Is the danger rating Considerable? Have you seen recent avalanche activity? Those factors increase the probability score. Consequence is all about the terrain. What happens if this slope slides? Does it run into a field of trees or rocks? Does it end in a gully (a terrain trap) or go over a cliff? Is rescue even possible here? A wide-open, low-angle slope with a clean runout has low consequences. A steep, narrow chute above a 100-foot cliff has extreme consequences. The key is to assess them independently.
The Colorado Avalanche Information Center provides data that helps inform these decisions. This table offers a simplified way to score your risk before committing to a line, based on their extensive analysis of accident reports and contributing factors. This is a model you can adapt for your own use in the field.
This process of structured thinking helps mitigate what avalanche professionals call “human factors”—the psychological traps we fall into. Esteemed avalanche expert Dale Atkins highlighted this during a workshop, as reported by an in-depth analysis from the Denver Post:
Knowing the outcome prejudices our opinions. Instead, consider what made the people involved in an accident think they were making a good decision.
– Dale Atkins, Longtime Colorado avalanche professional
This is a powerful reminder to analyze our own decision-making process before it’s too late.
To aid in this process, a risk matrix like the one below, based on professional models, can be a powerful tool. A systematic approach to risk assessment is a hallmark of expert decision-making.
| Factor | Score 1 (Low) | Score 3 (Moderate) | Score 5 (High) |
|---|---|---|---|
| Probability | Low avalanche forecast, no red flags observed | Moderate rating, 1 red flag present | Considerable/High rating, multiple red flags |
| Consequence | Open slope, soft runout, no terrain traps | Some trees/rocks, moderate runout | Cliffs below, terrain traps, no rescue zones |
| Rescue-ability | Multiple safe zones, easy access | Limited safe zones, moderate access | No safe zones, impossible rescue scenario |
| Decision Rule | Score 3-6: Proceed with caution | Score 7-10: Significant reassessment needed | Score 11-15: Find alternative terrain |
Before you drop in, stop with your partner and verbalize your scores for both probability and consequence. If the total score is high, it’s not a sign of weakness to back off—it’s a sign of intelligence.
How to predict an afternoon thunderstorm using only cloud formation cues?
Your observational awareness in the backcountry can’t be limited to the snow under your feet. The sky holds critical clues about rapidly changing weather that can impact snow stability and your personal safety, especially in the spring and summer. An approaching thunderstorm brings two major threats: lightning on exposed ridgelines and rapid warming, which can trigger wet slab avalanches. Learning to read the progression of clouds can give you hours of advance warning to get to safer terrain.
Convective thunderstorms build in a predictable sequence. By watching the clouds evolve throughout the day, you can create a mental timeline and identify your “decision point”—the time you need to start heading down. The key is to watch for vertical development. When clouds start growing upwards faster than they are spreading sideways, it’s a sign of an increasingly unstable atmosphere.
Use this general timeline to guide your observations:
- Morning (8-10am): Look for small, puffy, fair-weather clouds (cumulus humilis). These indicate stable conditions and a good weather window.
- Late Morning (10am-12pm): Monitor for vertical growth. If those small puffs start to build into taller towers, your weather window is beginning to shrink.
- Midday (12-2pm): The appearance of towering, cauliflower-like clouds (cumulus congestus) is a major warning sign. This signals a 2-3 hour window until storm potential becomes high.
- Early Afternoon (2-4pm): If you see clouds with flattened, anvil-shaped tops (cumulonimbus), the storm is mature and the risk of lightning is imminent. You should already be in a safe location.
The critical connection for snowboarders is how this weather affects the snow. As documented in numerous incident reports, pre-storm warming events can rapidly degrade the snowpack. The energy from the sun, trapped by increasing cloud cover, can lead to wet-slab avalanches, which are notoriously destructive. Your decision point must be when you see vertical development beginning to exceed the cloud’s width. That is your cue to begin your descent immediately, long before you hear the first rumble of thunder.
Reading the sky is just as important as reading the snow. It’s a key part of the 360-degree awareness that defines an experienced backcountry traveler.
Key Takeaways
- Your brain, not your gear, is your primary safety tool. Cultivate a mindset of constant observation and questioning.
- Risk is a formula: Probability x Consequence. Assess them separately and objectively before every single run.
- Master your rescue gear until it’s second nature. Speed and efficiency under pressure are what save lives.
How to Manage the “Adrenaline Dump” After Extreme Sports?
You’ve just ridden the best line of your life. The snow was perfect, you navigated the exposure flawlessly, and you’re buzzing with a mix of adrenaline, relief, and pure stoke. This feeling of euphoria is what we chase, but it’s also an incredibly dangerous mental state. The “adrenaline dump” can create a feeling of invincibility, short-circuiting your rational decision-making process. This is where many groups make their fatal mistake—on the *second* lap.
Accident analysis consistently shows that human factors like ego, the fear of missing out (FOMO), and post-thrill euphoria are primary contributors to bad decisions. After a successful run, your perception of risk becomes skewed. You’re more likely to underestimate danger and push for a slightly more aggressive line on the next lap. Managing this “good” adrenaline is just as important as managing the “bad” adrenaline of fear or panic. The goal is to channel that energy into learning, not into reckless escalation.
The best tool for this is the hot debrief. The moment you regroup in a safe zone at the bottom of a run, before you even think about another lap, you must force a structured conversation. This simple protocol grounds you and your partners back in reality:
- Stop and Breathe: The first step is to do nothing. Stand in your safe zone and take 30 seconds of deep breaths. Let your heart rate start to come down.
- Conduct a 2-Minute Debrief: Ask two simple questions: “What did we expect to find on that run?” and “What actually surprised us?” This forces an analytical reflection on your plan versus reality.
- Assess Your Physical State: Are your hands shaking? Is your vision narrowed? Acknowledge the physical symptoms of adrenaline. Naming them helps to control them.
- Verbalize Observations: Talk about specific snow conditions or terrain features you noticed. This pulls your brain out of the emotional high and back into analytical observation mode.
- Decide Only After Normalizing: Do not make a decision about the next line until everyone’s heart rate has returned to near normal and you can clearly articulate the plan, including entry, exit, and safe zones.
This discipline is what separates seasoned veterans from cautionary tales. Recognizing that the moment of your greatest triumph is also the moment of your greatest vulnerability is the mark of a true backcountry expert.
Frequently Asked Questions on Backcountry Snow Safety
What are the five universal avalanche red flags?
The five main red flags are: recent avalanches (within the last 48 hours), signs of wind loading (drifts and cornices), rapid warming or sun exposure, rain on snow, and any obvious signs of instability like “whumpfing” sounds or shooting cracks in the snow surface.
What is a ‘whumpf’ sound and why is it dangerous?
A “whumpf” is a distinct, hollow, drum-like sound you hear and feel as you travel over snow. It is the sound of a weak layer in the snowpack collapsing under your weight. It is an undeniable sign that the snow structure is unstable and primed to avalanche.
Should you continue if you observe one red flag?
No. The presence of even a single major red flag, such as a whumpf or a recent avalanche, requires an immediate stop and reassessment of your plan. It means the conditions are dangerous. The presence of multiple red flags is a clear signal to retreat to simple, low-angle terrain (below 25 degrees) or go home immediately.