The true key to surfing legendary reef breaks isn’t aggression or gear; it’s mastering the subtle art of observation to navigate both physical dangers and social codes.
- Physical safety comes from “water literacy”—reading tide-sucked reefs, subtle water textures, and choosing gear for penetration, not just paddle power.
- Social acceptance is earned through a “silent conversation” in the lineup, demonstrating awareness and respect long before you even paddle for a wave.
Recommendation: Shift your focus from simply catching waves to deeply observing the environment and the people in it. This mindset is your most critical piece of equipment.
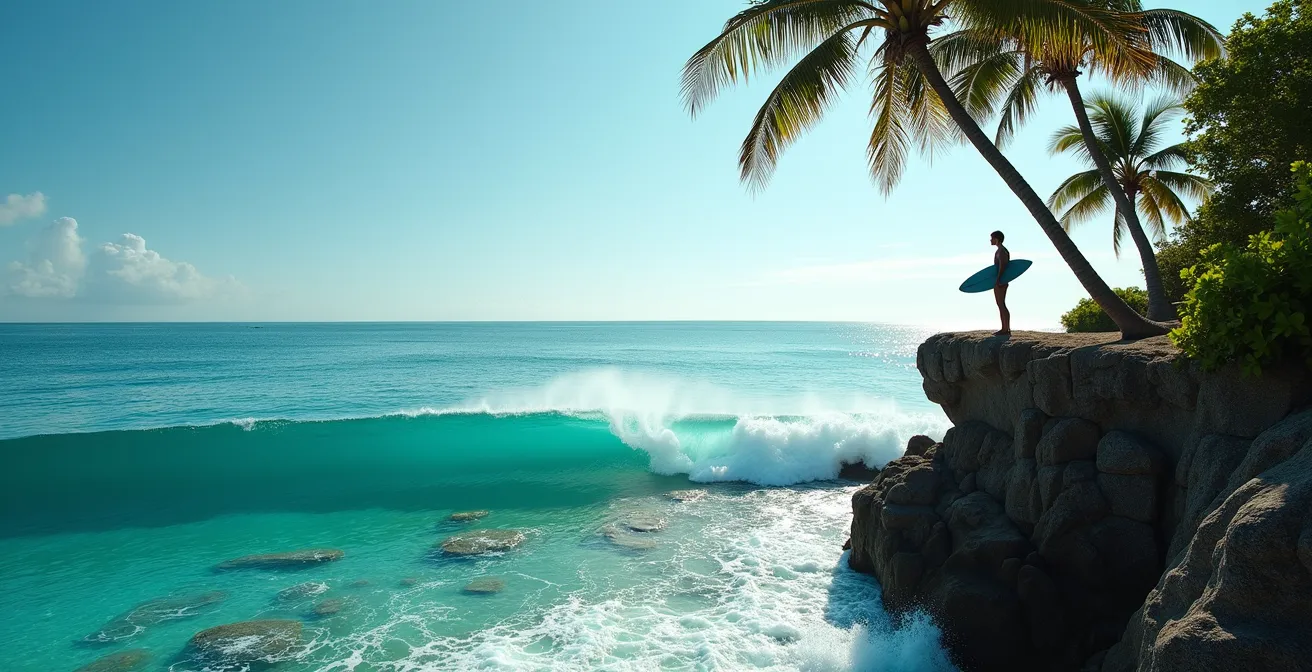
You’ve seen the photos, the videos. A flawless, turquoise wave peeling mechanically over a shallow reef in some far-flung paradise. It’s the wave that fuels the dreams of every intermediate surfer ready to level up. Yet, standing on that shore, the dream is often overshadowed by two sharp-edged realities: the physical danger of the reef itself and the social minefield of a crowded, localized lineup. You have the skills to ride the wave, but do you have the knowledge to navigate the situation?
The common advice feels inadequate. “Wear booties,” “check the tides,” “respect the locals.” While true, these are just the chapter titles, not the story. They don’t explain the subtle, non-verbal language that grants you a wave in a tight-knit crew, nor do they teach you to read the almost invisible signs of a dangerously shallow section of reef. They don’t prepare you for the unique character of tropical water infections or the counter-intuitive physics of catching a wave that moves with terrifying speed.
This is where we go deeper. This guide is built on a different philosophy: surviving and thriving on an iconic reef break is not about following a checklist, but about developing a profound sense of awareness. It’s about learning to read the invisible language of the ocean, the lineup, and your own body. We’ll move beyond the platitudes to explore the real-world mechanics of reef break safety—both in the water and in the social hierarchy.
We will break down the crucial elements of water literacy, the unspoken rules of lineup sociology, and the mental tools needed to stay calm under pressure. By the end, you won’t just have a list of things to do, but a new framework for seeing and understanding the world’s most challenging and rewarding waves.
This article provides a comprehensive roadmap, covering the real dangers of the reef, the art of entering a lineup, reading water conditions, choosing the right equipment, and even how your mind and senses can become your greatest allies. The following sections offer a structured path to building that veteran-level awareness.
Summary: A Veteran’s Guide to Surfing Famous Reefs
- Why reef cuts are more dangerous than you think in tropical waters?
- How to enter a crowded lineup at a famous break without getting yelled at?
- Glassy or Offshore: Which wind condition is safer for shallow reef surfing?
- The volume error that makes catching fast reef waves almost impossible
- When to paddle out to avoid the ‘Dry Reef’ danger zone?
- Why time seems to slow down when you are in physical danger?
- Why the sound of ocean waves synchronizes brain patterns for deep relaxation?
- How to Choose a Beachfront Resort That Satisfies Surfers and Sunbathers?
Why reef cuts are more dangerous than you think in tropical waters?
A scrape on a reef is not like a fall on sand or rock. In tropical environments, it’s an injection of foreign organic matter. The danger isn’t just the cut itself, but what the coral leaves behind. Live coral is a fragile, complex organism, and when it breaks under your weight, it introduces a cocktail of microscopic polyps, algae, and bacteria deep into the wound. Your body sees these as invaders and mounts a powerful, prolonged inflammatory response, which is why a seemingly minor cut can fester for weeks and resist normal healing.
This is the mechanism behind the infamous “coral tattoo.” Instead of healing cleanly, the skin can heal over tiny, embedded coral fragments. The body, unable to expel them, creates chronic inflammation that can last for months, sometimes leaving a permanent, discolored mark. The bottom is rarely flat; it’s a landscape of holes and living structures. That’s why immediate, aggressive cleaning is non-negotiable. It’s not about being tough; it’s about preventing a month-long infection that could ruin your entire trip.
Case Study: The ‘Coral Tattoo’ Phenomenon in Indonesia
In many tropical regions, even minor cuts can become severely infected. Surf camps have documented countless cases where coral fragments embedded in wounds create chronic inflammation lasting for months. The uneven reef floor means a simple step can cause you to fall onto live coral. This injects microscopic polyps and algae that the body continuously tries to reject, as one report on Indonesian surf camp experiences explains, preventing proper healing and leading to the “coral tattoo” effect.
The first fifteen minutes after a reef cut are more critical than the following fifteen days. Having a clear, rehearsed protocol is essential because you won’t have time to think. Your only job is to get out of the water and start the cleaning process immediately and thoroughly.
Your Action Plan: The First 15 Minutes Protocol for Reef Cuts
- Exit & Assess: Get out of the water immediately. Look closely at the wound for deep punctures or any visible, embedded coral fragments that might require tweezers or professional removal.
- Flush Thoroughly: Use copious amounts of fresh, clean water to flush the wound for at least five minutes. Never use salt water, as it contains the very microorganisms you’re trying to remove.
- Neutralize Toxins: This is a classic surf traveler’s trick. Apply fresh lime or lemon juice directly to the wound. It will sting intensely, but the citric acid is highly effective at neutralizing certain marine toxins and bacteria.
- Disinfect & Protect: After flushing, clean the area with hydrogen peroxide or an antiseptic like Betadine. Once dry, apply a generous layer of antibiotic cream and cover with a sterile bandage.
- Monitor for Warning Signs: In the hours and days that follow, be vigilant. Spreading redness from the wound, red streaks moving up a limb, fever, or the formation of pus are all signs of a serious infection requiring immediate medical attention.
How to enter a crowded lineup at a famous break without getting yelled at?
Paddling into the lineup at a world-class break is like walking into a stranger’s living room. Barging in and making yourself at home is the quickest way to get thrown out. Respect is not a given; it’s earned through a subtle, non-verbal dialogue that begins the moment you approach the water. Locals aren’t necessarily aggressive; they are protective of a limited resource and wary of anyone who might disrupt the flow or, worse, become a safety hazard.
The key is to demonstrate awareness. Your initial goal is not to catch a wave, but to show that you understand the unspoken rules. This “silent conversation” involves your positioning, your posture, and your patience. Before you even think about competing for a peak, you must prove you are not a threat. This means staying out of the way, observing the rotation, and identifying the key players in the lineup. Acknowledging their priority with a simple nod or by consciously holding back shows you understand the hierarchy.
The image above illustrates the critical geography of a reef break. The impact zone is where the waves break, and the channel is the deeper water path used to paddle back out. Never paddle through the impact zone where a surfer might be riding. Use the designated channel, even if it’s a longer paddle. This single act communicates more about your experience level than anything else.
- Observe from Shore: First, watch for at least 15 minutes. Identify the main takeoff spots, the path surfers use to paddle out (the channel), and who the established locals are.
- Paddle Wide and Slow: Use the channel. Do not paddle straight for the peak. Your entry should be wide, slow, and non-threatening.
- Start on the Shoulder: Your initial position should be on the shoulder of the wave, well away from the main takeoff zone. This is your observation post. Your job here is to watch, not to hunt. Keep your board pointed towards the shore, not out to sea, signaling you are waiting, not competing.
- Practice the “Silent Conversation”: Make brief, respectful eye contact with a few of the established surfers. A simple nod is enough. If a set wave approaches and you’re near the takeoff zone, use a clear “shoulder dip”—a slight turn of your board away from the wave—to signal “I’m not going.” This explicitly communicates you are not challenging them for priority.
- Wait Your Turn: After 15-20 minutes of patient observation from the shoulder, you can slowly work your way closer to the peak. Wait for a lull or an inside wave that nobody wants. Your first wave should be an uncontested one. Earning your spot is a marathon, not a sprint.
Glassy or Offshore: Which wind condition is safer for shallow reef surfing?
Wind is not just about wave quality; it’s a critical safety factor on a shallow reef. While a strong offshore wind can sculpt a wave into a perfect, hollow cylinder, it can also be your worst enemy. The common perception is that offshore is always better, but for safety, the answer is more nuanced. The ideal condition is often a calm, or “glassy,” day.
On a glassy day, the water’s surface is a perfect window to the reef below. You can clearly see the dark patches of deep water and the light, menacing patches of shallow coral. This crystal-clear visibility allows you to plan your line and, more importantly, to know where it’s safe to fall. A light offshore wind (5-10 knots) is manageable, but as the wind strengthens, it creates two major problems. First, the spray coming off the top of the wave acts like a curtain, completely obscuring your vision as you drop in. You’re essentially surfing blind. Second, a strong offshore wind can get under your board during a late drop or a wipeout, throwing you backwards into the flats with violent force, directly onto the shallowest part of the reef.
This is where “water literacy” becomes vital. Regardless of the wind, you must learn to read the texture of the water itself. This skill is more reliable than just looking at the color.
Case Study: Water Texture Reading in Indonesia
Experienced surf guides in places like the Mentawai Islands teach surfers a crucial technique: how to spot “boils.” A boil is a circular upwelling or a subtle turbulence on the water’s surface. As one guide explains, you must “watch out for boils” because they are the tell-tale sign of a dangerously shallow point or a rock lurking just beneath the surface. The wave’s energy is being forced upwards by the obstacle, creating this surface disturbance. Learning to identify these boils, which are visible even on windy days, is a far more reliable method for spotting hazards than just looking for changes in water color.
The following table breaks down the risks associated with different wind conditions, helping you make a more informed decision before paddling out.
| Condition | Safety Factor | Visibility | Wave Lip Behavior | Wipeout Risk |
|---|---|---|---|---|
| Glassy (No Wind) | Safer | Crystal clear water surface | Predictable, clean lip | Controlled falls, easier duck dives |
| Light Offshore (5-10 knots) | Moderate | Good, slight spray | Holding, feathering lip | Slightly delayed drops |
| Strong Offshore (15+ knots) | More Dangerous | Spray obscures vision | Throws surfer backwards | Late drops, violent throwbacks |
The volume error that makes catching fast reef waves almost impossible
One of the most common and dangerous mistakes intermediate surfers make at powerful reef breaks is choosing the wrong board. The intuition, coming from softer beach breaks, is to use more volume for better paddle power. On a steep, fast-moving reef wave, this is a recipe for disaster. This is the Buoyancy Paradox: too much flotation, which helps you on a mushy wave, prevents you from succeeding on a powerful one.
A fast reef wave isn’t something you paddle “onto”; it’s something you paddle “into.” The face is often vertical, or even concave. A high-volume, buoyant board will sit on top of the water, and as the wave jacks up, it gets “sucked up the face” and then pushed out the back. You can’t get the rail to engage. What you need is a board with less volume, a more refined rail, and a bit more rocker. This allows the board to penetrate the water, letting the rail “bite” into the steep face so you can set your line. It’s about control and engagement, not just paddle speed. In fact, surf equipment analysis reveals that boards with even slightly less volume can have a huge impact on success rates for these critical takeoffs.
The best surfers in the world demonstrate this principle at the most demanding reef breaks. Their equipment choices are a masterclass in understanding the physics of a powerful wave.
Case Study: The Buoyancy Paradox at Pipeline
The Banzai Pipeline is arguably the most famous reef break on Earth. It’s a place where the shallower the reef, the more powerful it becomes, demanding absolute precision. Look at the quiver of a professional Pipeline specialist. They consistently choose boards that are 3-5 liters *less* in volume than what they would ride in smaller, weaker waves. This isn’t a mistake. They are sacrificing pure paddle speed for the critical ability to penetrate the wave face and hold a line. Their boards are designed to knife into the water, not to float on top of it, proving that on the world’s heaviest waves, control trumps buoyancy.
This doesn’t mean you should grab a tiny, wafer-thin pro model. It means you should consider a “step-up” board that is a few inches longer than your standard shortboard but has a more refined shape and less overall volume than a high-volume “funboard.” It should feel like a tool for precision, not a raft for flotation.
- Assess the Wave Speed: Is the wave “jacking up” quickly over the reef? If so, your high-volume board is a liability.
- Prioritize Rail Engagement: Choose a board with rails that are designed to bite into the water, not thick, forgiving rails designed to float over it.
- Think Penetration, Not Flotation: Your goal is to get the board’s rail into the wave face as early as possible. Less volume helps the board sink just enough to engage.
- Talk to a Shaper: When buying a board for a surf trip, explain the type of wave you plan to surf. A good shaper will understand the need for a more refined, lower-volume step-up for hollow reef breaks.
When to paddle out to avoid the ‘Dry Reef’ danger zone?
The tide chart is your starting point, not your final answer. While it’s a fundamental truth that low tide means the reef is more exposed and shallow, relying solely on a tide app is a rookie mistake. The real depth over a reef is a dynamic interplay between the tide, the swell size, and the swell period. A long-period swell (with more time between waves) pulls significantly more water off the reef during the “suck-out” before a wave arrives, creating a temporary, and extremely dangerous, low tide condition.
This is the “Dry Reef” danger zone. You might paddle out at what the chart says is a safe mid-tide, only to find the reef completely exposed for several seconds between the waves of a big set. This is where the worst injuries happen. Your leash gets snagged, and the next wave grinds you across the coral. True water literacy means learning to assess the actual water depth in real-time, using the ocean itself as your gauge.
Before you even touch the water, you must become a patient observer. Your safety depends not on what a chart predicts, but on what the ocean is actually doing right now.
The image above gives a glimpse into this danger. The exposed coral heads are obvious, but the real hazard lies in the “in-between” zones that are covered one moment and dry the next. You must develop a method to read these fluctuations from the safety of the shore.
- Watch a Full Set Cycle: Before entering, sit on the beach and watch at least one full set of the largest waves roll through. Pay close attention to the troughs between the waves. How much reef becomes visible? Are there coral heads poking out? This is your true low-water mark.
- Find Your Landmark: Identify a specific, fixed object as your personal depth gauge. It could be a prominent rock or a uniquely shaped coral head. Note how the water level changes on this landmark between sets and during lulls. Don’t paddle out until the water consistently stays well above it.
- Factor in the Swell Period: The longer the period (the time between waves), the more water is displaced. As a rule of thumb, if the swell period is over 12 seconds, you need to be more cautious. Add at least an extra hour to the rising tide before you consider it safe, compared to a short-period swell.
- Wait for the “Buffer”: Never paddle out the exact moment the tide chart says it’s “safe.” On a rising tide, wait at least 30-60 minutes *after* your minimum safe tide height has been reached. This provides a crucial buffer against larger, unexpected sets that pull more water off the reef.
Why time seems to slow down when you are in physical danger?
It’s a phenomenon many surfers have experienced during a heavy wipeout: time seems to stretch. The violent, two-second thrashing feels like a slow-motion, thirty-second movie. This isn’t your imagination. It’s a well-documented psychological phenomenon called tachypsychia. When your brain perceives a life-threatening situation, it kicks into overdrive, flooding your system with adrenaline. It’s not that time itself slows down, but that your brain starts processing information at an incredibly high speed, recording far more “frames per second” than usual. You are essentially creating more memories per second, so when you play it back, the event feels elongated.
For most people, this is a terrifying and passive experience. For the prepared surfer, it can be a powerful tool for survival. Instead of being a victim of this slow-motion perception, you can learn to harness it. The “extra time” your brain gives you is a window of opportunity to take deliberate, life-saving actions. It’s enough time to orient yourself, protect your head, and consciously relax to conserve oxygen. But this ability doesn’t just appear; it must be trained through visualization and breath-hold practice. You are training your mind to stay in control when your body is in chaos.
The key is to transform a panic response into a planned response. By mentally rehearsing the steps you will take during a wipeout, you create a “muscle memory” for your brain. When tachypsychia kicks in, your brain doesn’t freeze; it defaults to its training.
- Practice Visualization: Every day, take a few minutes to close your eyes and mentally rehearse a wipeout in extreme slow motion. See the lip throwing over, feel the impact, and then calmly and deliberately execute your survival plan.
- Train Your Breath: Simple breath-hold exercises in a pool or even on your couch build your tolerance to CO2. This reduces the frantic, panicked urge to breathe, allowing you to remain calm and think clearly during a long hold-down.
- Master the “Tuck and Cover”: During the perceived slow-motion, your primary job is to make yourself as small and protected as possible. The instant you feel you’re going down, execute the tuck and cover: bring your knees towards your chest and wrap your arms firmly around your head, protecting it from impact with the reef or your own board.
- Use the “Extra Time” to Orient: While underwater, use the moment of calm between turbulence to orient yourself. Feel for the upward pull of buoyancy. Try to determine which way is up so you’re not swimming towards the bottom.
- Consciously Relax: The most important and difficult step. In that slow-motion perception, consciously tell your major muscle groups (legs, arms, shoulders) to relax. Fighting and struggling burns massive amounts of oxygen. Relaxing can double your effective breath-hold time.
Why the sound of ocean waves synchronizes brain patterns for deep relaxation?
The calming effect of the ocean is more than just a poetic notion; it’s a neurological reality. The sound of waves is not just background noise. It has a specific acoustic structure that directly influences our brainwave patterns, shifting us from a state of alert, active thinking into a state of relaxed awareness. This is a powerful tool for any surfer, both for pre-session focus and post-session recovery.
The science behind this lies in the type of noise that waves produce. It’s not the jarring “white noise” of static, but a more soothing “pink noise.” Pink noise has a consistent power across all octaves, meaning it has a balance of high and low frequencies that our brain perceives as non-threatening and harmonious. This auditory input has a measurable effect on our neural oscillations.
The sound of waves creates a ‘pink noise’ pattern that slows brainwave frequencies from beta (13-30 Hz) to alpha state (8-13 Hz), promoting calm focus rather than sleep – it’s why many pro surfers listen to ocean sounds before competing.
– Dr. Orfeu Buxton, Penn State Sleep Research Lab
This shift to an alpha brainwave state is the sweet spot for performance. It’s the state associated with “flow,” where you are calm, focused, and highly aware without being anxious or overthinking. But for a veteran surfer, sound is more than just a tool for relaxation; it’s a tool for navigation.
Case Study: Pro Surfers Using Sound Mapping at Pipeline
At a complex and dangerous break like Pipeline, experienced surfers develop a form of “acoustic navigation.” They can distinguish between multiple distinct sound zones: the gentle lapping on the beach (the safe zone), the medium-intensity roar from the channel (the paddle-out zone), and the deafening, ground-shaking thunder of the impact zone. Lifelong Pipeline specialists use these auditory cues to navigate the break, especially in low-light conditions like pre-dawn or dusk. They can time their movements and position themselves based on the intensity and character of the sound, using their ears as much as their eyes.
You can apply this in your own surfing. Start actively listening. Close your eyes on the beach and learn to distinguish the sound of an outside set from the sound of an inside reform. This deepens your connection to the ocean and turns a passive sense into an active instrument for reading the environment.
Key Takeaways
- Observe First, Act Second: Your most important session is the one you have on the beach, watching the reef, the tide, and the lineup before you ever get wet.
- Respect is Awareness in Action: Earning your place in a crowded lineup has less to do with your skill and more to do with your ability to demonstrate you understand the unspoken rules of space and priority.
- Your Gear Must Match the Wave’s Power: On steep, fast waves, less volume is often more. Prioritize a board that offers control and penetration over one that just offers paddle speed and flotation.
How to Choose a Beachfront Resort That Satisfies Surfers and Sunbathers?
The perfect surf trip often involves a delicate negotiation between your obsession with waves and your partner’s or family’s desire for relaxation. Choosing the right beachfront resort is the key to satisfying both. The ideal location isn’t just about being close to the water; it’s about strategic positioning and amenities that cater to the specific needs of both a dedicated surfer and a sun-seeking companion.
For the surfer, proximity is everything, but it needs to be the right kind of proximity. You need a direct line of sight to the break for those crucial dawn patrol checks. You need practical facilities like secure board storage and a rinse station, not just a dusty rack in a corner. If the main break is offshore, proximity to a reliable boat launch is more important than being right on the sand.
For the non-surfer, the resort needs to be a destination in itself. This means a comfortable, swimmable beach area away from the surf zone, a pool with a view, and, crucially, a great spot to watch the action. An elevated restaurant or bar that overlooks the break is the ultimate compromise, allowing your partner to relax in comfort while still feeling connected to your session. It turns your surf time into a shared experience rather than a solitary pursuit. Finding a resort that has thoughtfully considered both sets of needs is the secret to a harmonious and successful trip.
Your Action Plan: The Strategic Resort Checklist
- Verify the View: Before booking, confirm a direct and clear line of sight to the main surf break from a common area or, ideally, your room. A “beachfront” hotel facing the wrong way is useless for dawn patrol checks.
- Confirm Boat Access: If you’re targeting offshore reef breaks, check the resort’s proximity to a reliable boat launch or charter service. A 10-minute walk or less is ideal.
- Inspect Board Facilities: Look for specific mentions of a dedicated, secure, and ventilated board storage area with a nearby freshwater rinse station. “Board racks available” can often mean a few rusty bars in the sun.
- Identify Multiple Access Points: The best resorts have separate, designated access points for surfing and swimming. This ensures swimmers are safe and surfers have a clear path to the channel without disturbing other guests.
- Seek an Elevated Vantage Point: The ultimate feature is an elevated restaurant, bar, or lounge area with a panoramic view of the surf break. This allows your partner or family to watch you surf in comfort, making your sessions a shared spectacle.
Mastering an iconic reef break is a journey of deep learning. It’s about shifting from being a person who simply rides waves to a waterman or waterwoman who understands the ocean’s rhythms, the lineup’s social fabric, and their own mental landscape. With these principles of observation and respect, that dream wave doesn’t have to be an intimidating challenge, but the next logical step in your surfing life.