In summary:
- Your road bike is more gravel-capable than you think; success lies in smart, low-cost adjustments, not expensive new components.
- Tire pressure and width are the most critical factors. Running lower pressure provides suspension and traction, making you faster and safer on rough terrain.
- Gravel miles demand more energy. You must recalibrate your fueling and hydration strategy to account for rides taking 25-30% longer than the equivalent road distance.
- Adopt a resourcefulness mindset for everything from trailside repairs to route planning. Self-sufficiency is the core of gravel adventure.
You’ve seen them from the corner of your eye while hammering out road miles: the quiet dirt path branching off into the woods, the farm track cutting between fields, the intriguing gravel road winding over a hill. The call to explore beyond the pavement is strong, but the thought of shelling out for a dedicated gravel bike is a major hurdle. The good news? That capable endurance road bike in your garage is likely your ticket to adventure, provided you approach the transition with the right knowledge.
Many will tell you to simply buy a gravel bike, or at the very least, to start swapping out major components like handlebars and gearing. But before you open your wallet, the most impactful changes are also the cheapest. The real key to unlocking your road bike’s off-road potential isn’t found in a parts catalog. It’s about a fundamental recalibration of your setup, your body’s engine, and your rider’s mindset. It requires developing a sense of mechanical sympathy—an understanding of how to adapt your existing machine to handle terrain it wasn’t explicitly designed for.
This guide is built on that principle. We’ll bypass the expensive upgrades and focus on the practical, mechanical, and strategic adjustments that make the biggest difference. We will dive into the counter-intuitive physics of tire pressure, the non-negotiable safety checks for fitting wider rubber, the debate over pedals for technical descents, and the crucial fueling adjustments that prevent the dreaded “bonk.” We’ll also cover the essential skills of finding routes, packing tools, and even preparing your bike for travel, equipping you to be a resourceful, self-sufficient rider. This is your mechanic’s guide to riding dirt without a new rig.
To help you navigate this transition, this guide is structured around the key challenges and solutions you’ll face. Explore the sections below to build your confidence and prepare your bike for its first taste of gravel.
Summary: Your Guide to Gravel on a Road Bike
- Why running lower tire pressure makes you faster on gravel, not slower?
- How to fit wider tires on your existing endurance road frame safely?
- Clipless or Flats: Which is safer for technical gravel descents?
- The calorie mistake that causes bonking because gravel miles take longer than road miles
- How to use mapping apps to find the “hidden” connectors between paved roads?
- What are the 5 tools you must carry to fix a mechanical failure on the trail?
- How to find water in rural France when shops are closed for siesta?
- How to Protect Your Carbon Frame When Flying to Cycling Destinations?
Why running lower tire pressure makes you faster on gravel, not slower?
For a road cyclist, the idea of lowering tire pressure to go faster sounds like heresy. On smooth tarmac, high pressure minimizes rolling resistance by creating a small, hard contact patch. On gravel, the physics are inverted. A rock-hard tire doesn’t roll *over* obstacles like pebbles and roots; it collides with them, deflecting upwards and costing you forward momentum. This constant bouncing is inefficient and fatiguing. The secret to speed on unpaved surfaces is surface compliance.
By lowering your tire pressure, you allow the tire casing to deform and absorb small impacts, effectively acting as your bike’s primary suspension system. Instead of fighting the terrain, the tire conforms to it, maintaining better contact with the ground for improved traction and control. This continuous contact, especially on climbs and through corners, is far more efficient than being bounced around. In fact, comprehensive research on gravel tire pressure optimization shows that riders using pressures in the 30-40 PSI range often see measurable speed gains on rough sections.
This isn’t just theory; it’s proven at the highest levels of the sport. At elite gravel events, the trend is overwhelmingly toward wider tires and lower pressures. An analysis of pro setups at major races reveals a clear strategy: maximize compliance to minimize fatigue and maintain speed over long distances. For instance, a look at the gear used at The Traka 2024, a premier European gravel race, found that 45mm tyres dominated the field, a width that only performs when paired with significantly lower pressures than any roadie would be used to. This shift demonstrates a deep understanding that on gravel, comfort and control are direct inputs to speed.
How to fit wider tires on your existing endurance road frame safely?
The single most effective upgrade for gravel riding is fitting the widest tire your frame can safely accommodate. A wider tire offers a larger air volume, which is what enables you to run the lower, more compliant pressures discussed previously. However, this is not a matter of just buying the biggest tire you can find. The limiting factor is your frame’s tire clearance—the space between the tire and the fork, chainstays, and seatstays.
Before you purchase any new rubber, you must become an expert on your own bike’s dimensions. As a rule of thumb, you need a minimum of 4mm of clearance on all sides of the tire. This gap is not just for show; it’s a critical safety margin that accounts for wheel flex during hard cornering and prevents mud or a picked-up pebble from jamming between the tire and your frame, which can cause a crash or serious frame damage.
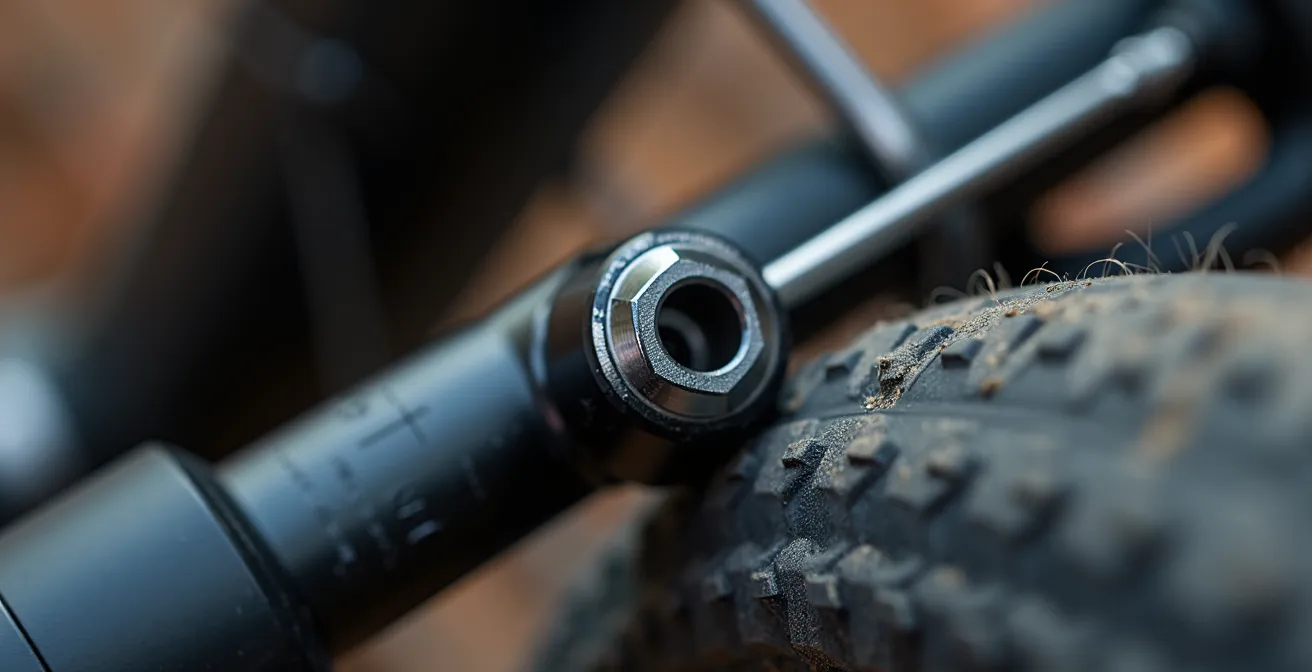
The most reliable way to measure this is by using a set of Allen keys as feeler gauges. With your current wheels and tires installed, find the tightest spots—usually at the chainstays right behind the bottom bracket—and see which key just fits. This gives you a precise measurement to work from. Remember that a tire’s labeled width and its actual, inflated width on your specific rim can differ, making a final test fit essential.
Your Pre-Gravel Tire Audit
- Frame Specification Check: Locate your bike’s official manual or the manufacturer’s website to find the stated maximum tire clearance. This is your theoretical starting point.
- Real-World Clearance Measurement: With your current road tires, use Allen keys to measure the tightest gaps at the chainstays, seatstays, and fork crown. Note these millimeter values as your practical baseline.
- Safe-Margin Calculation: Subtract at least 8mm from your tightest real-world measurement to determine your maximum safe tire width. This ensures a 4mm gap on each side for wheel flex and debris.
- Rim Width Compatibility: Check your internal rim width. A tire that is too wide for its rim will have an unstable, “lightbulb” profile and handle poorly. Cross-reference with an ETRTO compatibility chart to ensure they match.
- Final Test-Fit Verification: Before committing, mount your chosen tire and inflate it. Actual width can vary from the label. Re-measure all clearances with the new tire installed to confirm your safety margin is intact.
Clipless or Flats: Which is safer for technical gravel descents?
Road cyclists are conditioned to the locked-in efficiency of clipless pedals. The perfect, repeatable foot position and direct power transfer are ideal for paved roads. On a loose, unpredictable gravel descent, however, the inability to quickly dab a foot can be unnerving. This leads many to wonder if flat pedals are the safer choice. The answer, as with most things in cycling, is nuanced and depends on the system.
Your road-specific pedals (like Look Keo or Shimano SPD-SL) are a poor choice for gravel. They feature large cleats and a tight interface designed for power transfer, not for quick exits or walking. They also clog easily with mud, making it difficult to clip back in after a stop. Flat pedals offer an instant exit, which provides a huge confidence boost for beginners on tricky terrain. However, you sacrifice the “upstroke” portion of your pedal stroke, and your feet can bounce off on very rough sections if your technique isn’t perfect.
For most riders transitioning from road, the ideal solution is a mountain bike-style clipless system, such as Shimano’s SPD or Crankbrothers’ Eggbeater. These systems offer the best of both worlds. They use smaller, recessed metal cleats that make walking easy, and their double-sided entry and open design are far more resistant to mud. As the Cycling Weekly technical team notes, “off-road pedals shed dirt and mud more effectively than road pedals, which is a bonus when getting dirty while riding gravel.” They provide the pedaling efficiency you’re used to, but with an easier, more predictable release for those moments when you need to get a foot down fast.
This table breaks down the key considerations when choosing your pedal system for mixed-surface riding.
| Feature | MTB Clipless (SPD) | Flat Pedals |
|---|---|---|
| Quick Release | Good with practice | Instant |
| Power Transfer | Excellent | Good |
| Walkability | Excellent (recessed cleats) | Excellent |
| Mud Clearance | Very Good | Good |
| Learning Curve | Moderate | Minimal |
The calorie mistake that causes bonking because gravel miles take longer than road miles
As a road cyclist, you have an internal clock. You know how long 50 miles should take and how much food and water that effort requires. Taking this same fueling strategy to gravel is a recipe for disaster and the number one cause of “bonking” for transitioning riders. You must account for the “Gravel Tax”—the extra time and energy demanded by unpaved terrain. Your average speed will be significantly lower, meaning your time in the saddle for the same distance will be much longer.
The reasons are simple: increased rolling resistance from softer surfaces, more frequent and steeper undulations, and technical sections that demand intense focus and physical input. These factors add up. Studies and rider data consistently show that gravel riding can increase your ride duration by 25-30% compared to the same distance on the road. If you fuel for a 3-hour road ride, but your gravel route takes you 4 hours, you’ve created a one-hour caloric deficit that will shut your body down.
This requires a complete engine re-calibration of your nutrition plan. You are no longer fueling for distance; you are fueling for time. Before heading out, you need to think not in miles, but in hours, and pack accordingly. Easy access to fuel is also more important on bumpy terrain where taking your hands off the bars is a challenge. A handlebar-mounted feed bag is a common and wise gravel-specific adaptation. Your entire approach must shift from road efficiency to off-road endurance.
- Plan for Time, Not Distance: Before a ride, estimate your time based on a much lower average speed. Add 25-30% to your expected road time as a starting point.
- Increase Fuel and Water: Carry at least 20% more food and water than you would for an equivalent road ride. Add electrolytes, as you’ll likely be sweating for longer.
- Make Fuel Accessible: Use a top-tube or handlebar bag so you can eat and drink safely without stopping or fumbling with jersey pockets on rough terrain.
- Eat and Drink Proactively: Don’t wait until you feel hungry or thirsty. On gravel, you’re in a constant state of higher energy burn. Start fueling within the first 45-60 minutes.
How to use mapping apps to find the ‘hidden’ connectors between paved roads?
The true joy of gravel riding lies in discovery—piecing together a route that fluidly connects smooth pavement with hidden dirt tracks, creating a journey that’s impossible by car and unfulfilling on a skinny-tired road bike. This requires a shift in mindset from following a designated route to becoming a route creator. Your best tools for this are modern mapping apps, but you need to know how to look beyond the default road map.
Apps like Komoot, Strava, and Ride with GPS are powerful, but their magic lies in their layers. The standard map view will only show you official, recognized roads. The key is to switch to the satellite view and heatmaps. The satellite layer reveals the physical reality of the landscape: faint double-track through a field, an old farm lane, or a service road for power lines. These are often the missing links in a great mixed-surface loop. The heatmap layer, which shows where other cyclists frequently ride, is your next clue. A bright line cutting across a seemingly empty space on the map is a community-vetted endorsement that a path exists and is rideable.
By cross-referencing these layers, you can build a more complete picture. A faint line on the satellite view that corresponds with a strong signal on the heatmap is almost certainly a viable connector. This digital detective work is a core skill of the resourceful gravel rider.
Pro Route Planning: The Art of Cross-Referencing
Experienced gravel riders and race planners rarely rely on a single source of truth. Their technique involves a multi-platform analysis. They begin by using satellite views to identify potential unmarked connectors between known paved sections. Then, they overlay local heatmaps from platforms like Strava to see if these potential routes are actually being used by cyclists. This process often reveals farm tracks and service roads that provide crucial, scenic links. The final step often involves using a “street view” feature, where available, to visually inspect the entrance to a path to check for “No Trespassing” signs or gates before ever leaving home.
What are the 5 tools you must carry to fix a mechanical failure on the trail?
On the road, a mechanical issue is often a short walk from help or a phone call away. On a remote gravel track, you are your own mechanic. The vibrations and impacts of off-road riding increase the likelihood of something going wrong, and your tool kit must reflect this reality of self-sufficiency. While a standard multi-tool and spare tube are a start, a robust gravel kit anticipates the most common and ride-ending failures.
Your road frame’s derailleur hanger, for example, is not designed for the errant rock or stick that can be kicked up on a trail. A bent hanger will ruin your shifting and can even send your derailleur into your spokes. Similarly, a tubeless tire puncture that sealant can’t handle is a common issue. Your kit must contain the solutions to these specific gravel problems. Based on feedback from pro riders and seasoned mechanics, a truly effective emergency kit is about redundancy and specificity.
Here are the non-negotiable items that should be in your saddlebag or frame pack for any serious gravel ride:
- Tubeless Plug Kit: Essential for fixing punctures too large for sealant to handle. As one report from a major gravel event noted, “All riders we spoke to carried some form of plug system.”
- Spare Derailleur Hanger: This small, frame-specific part is designed to bend or break to protect your frame. Carrying a spare can turn a walk of shame into a 10-minute fix.
- Quick-Link Pliers: A broken chain is a rare but ride-ending event. Pliers, often integrated with a chain tool, make removing a damaged link and inserting a spare quick-link manageable on the trail.
- Heavy-Duty Zip Ties & Duct Tape: These are the universal fix-alls. Duct tape can patch a torn tire sidewall, and zip ties can secure a broken bottle cage, a loose cable, or even a damaged shoe.
- CO2 Inflator AND a Mini-Pump: Redundancy is key. A CO2 inflator is fast for re-seating a tubeless tire, but it’s a one-shot deal. A mini-pump is your guaranteed backup if the first attempt fails or you have multiple flats.
The 2024 ‘Silk Road Mountain Race’ in Kyrgyzstan—a multi-day, unsupported ultra-endurance race—saw a record number of participants, with successful finishers emphasizing the critical importance of carrying comprehensive tool kits including needle and thread for tire sidewall repairs.
– Unsupported ultra-endurance rider community
How to find water in rural France when shops are closed for siesta?
This very specific question is a perfect micro-lesson in the gravel rider’s resourcefulness mindset. Imagine you’re on a dream cycling trip, deep in the French countryside. It’s 2 PM, the sun is beating down, and your bottles are empty. Every ‘boulangerie’ and ‘supermarché’ has a “Fermé” sign in the window for the traditional midday siesta, which can last until 4 PM or later. This is a common scenario that can derail a ride if you don’t know where to look.
This is where local knowledge and keen observation become more valuable than any piece of gear. While commercial life pauses, public and social life often continues. The solution isn’t to wait, but to know the cultural landscape. In France, there are three reliable options for finding potable water when everything else seems closed.
First, and most reliably, head for the local cemetery (‘cimetière’). Nearly every village cemetery has a tap with potable water (‘eau potable’) used for watering flowers. It’s a publicly accessible, universally understood source of safe drinking water for cyclists in the know. Second, look for the town hall (‘Mairie’). Many Mairies, especially in smaller towns, will have a public fountain or tap on an exterior wall, often marked with a blue “Eau Potable” sign. Finally, while shops are closed, the local bar or ‘tabac’ (a café that also sells tobacco) is often the social hub that remains open. You can always purchase bottled water there, or more often than not, they will happily refill your bottles if you ask politely (‘Puis-je remplir mes bidons, s’il vous plaît?’).
Key Takeaways
- Lower tire pressure equals more speed and control on rough surfaces, not less, by allowing the tire to absorb impacts.
- Your bike’s absolute limit is tire clearance. Measure it precisely and leave a 4mm safety margin on all sides for mud and debris.
- Gravel riding demands more energy per mile. Adjust your fueling strategy by planning for rides to take 25-30% longer than the equivalent road distance.
How to Protect Your Carbon Frame When Flying to Cycling Destinations?
Your gravel adventures may eventually lead you further afield, and that means entrusting your bike to airline baggage handlers—a terrifying prospect for any owner of a carbon frame. Carbon fiber is incredibly strong for the forces it’s designed to handle while riding, but it’s vulnerable to side impacts and crushing forces that can occur during transit. Proper packing is not just a suggestion; it’s essential insurance for your frame.
Using a high-quality hard-shell or padded soft-shell bike case is the first step, but what you do inside the case is what truly protects your bike. The goal is to prevent any part from moving and to brace the frame against external pressure. This is especially critical as the global gravel bike tourism market continues its rapid growth, meaning more bikes are taking to the skies than ever before. A professional packing protocol focuses on insulation and structural reinforcement.
Follow these steps to give your bike the best possible chance of arriving in the same condition you packed it:
- Install Frame Protection Tape: Before you even start, apply clear protective tape to high-risk areas like the top tube, down tube, and chainstays to guard against scratches from parts moving inside the bag.
- Insulate All Tubes: Use foam pipe insulation from a hardware store to cover every tube of your frame. It’s cheap, lightweight, and provides excellent impact absorption. Secure it with tape or zip ties.
- Secure the Drivetrain: Remove your derailleur from the hanger, wrap it in bubble wrap, and zip-tie it securely between the chainstays. This protects both the derailleur and the hanger from being bent.
- Insert Axle and Fork Spacers: Your dropouts are vulnerable to being crushed when the wheels are removed. Re-insert your thru-axles with the plastic spacers that came with your bike (or use a dedicated tool) to brace the fork and rear triangle against lateral forces.
- Document Everything: Before closing the case, take several timestamped photos of your packed bike from different angles. This provides crucial documentation for any potential insurance claim if damage does occur.
Your road bike is more capable than you think. The next step is to stop reading and start experimenting. Use this guide to make your first low-risk adjustments and discover the unpaved path just beyond the tarmac.
Frequently Asked Questions About Gravel Riding Logistics
Where can I reliably find potable water in French villages?
Cemetery taps (‘Cimetière’) are almost always available with potable water for watering flowers, typically marked and free to use. They are the most reliable option when shops are closed.
What establishments stay open during siesta hours (12-4 PM) in France?
Local bars and ‘tabacs’ (cafés that also sell tobacco products) often remain open as social hubs, where you can purchase bottled water or politely request to fill your bottles.
How do I identify public water fountains?
Look for blue ‘Eau Potable’ signs, which indicate safe drinking water. These are commonly found on the exterior walls of town halls (‘Mairie’) or in main town squares.